User Settings
The user settings page centralizes your personal configuration: profile information, API tokens, connected integrations, security options, subscription details, and preferences that apply across all your threads and teams.
Accessing Settings
- Click your profile avatar in the top-right corner of the header.
- Select Profile from the dropdown menu.
- The settings page opens with tabbed navigation.
General
The General tab manages your identity and display preferences.
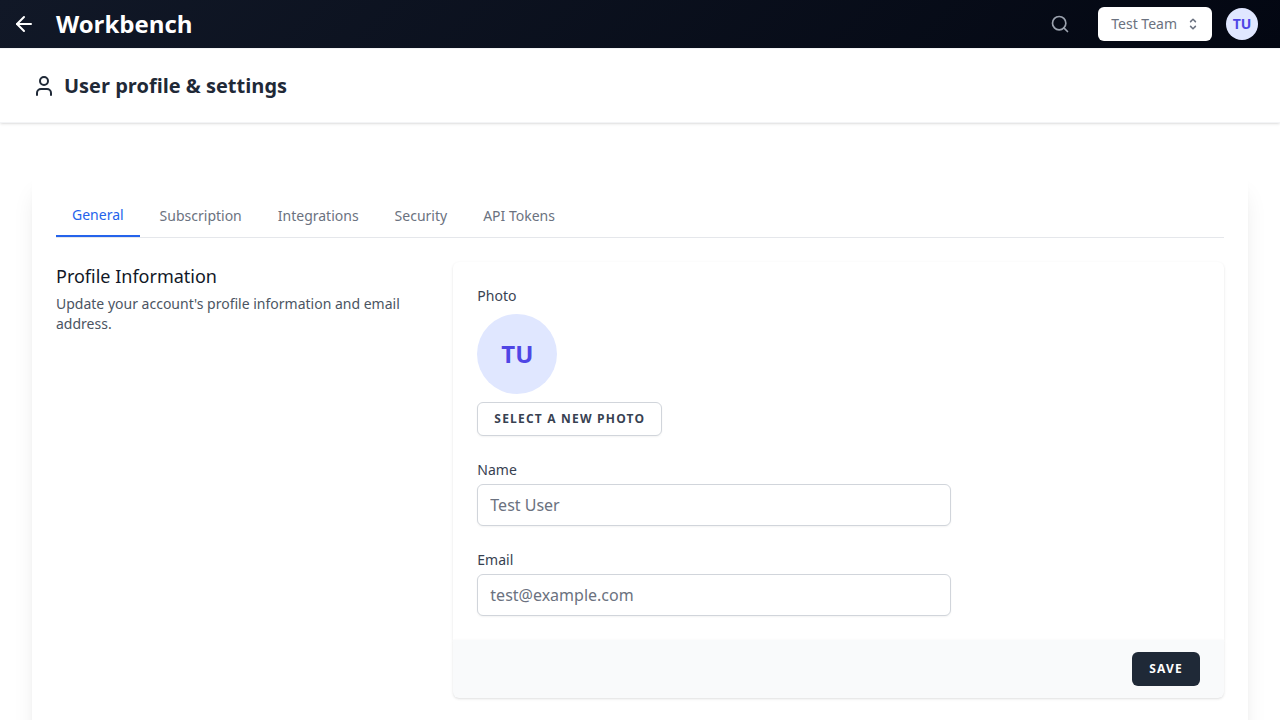
Profile Information
- Name -- Your display name, shown in thread messages, team member lists, presence indicators, and shared context block attributions. Update it at any time.
- Email -- Your login email address. This is also the address used for notifications, scheduled prompt delivery, and team invitations. Changing your email requires verification of the new address.
Language Preference
Select the interface language for the application. GPT Workbench currently supports English and French. The language setting affects all UI elements, navigation labels, and documentation links. It does not affect AI model responses -- those follow the language of your prompt and system prompt.
Dark Mode
Toggle between light and dark interface themes. The setting applies immediately across the entire application. Dark mode reduces eye strain during extended sessions and works well in low-light environments. Your preference is saved and persists across sessions and devices.

Preferred Model
Set the default AI model for all new threads you create. When you start a new thread, it automatically uses this model instead of the platform default. You can still change the model per-thread at any time.
The model selector displays all available models grouped by provider (Anthropic, Google, OpenAI, xAI, Mistral). Your preferred model is highlighted. If your organization restricts certain models, only permitted models appear in the list.
Personal Context
Personal context is a text block that you can configure to be automatically included in all your threads when enabled. This is useful for persistent instructions that apply to every AI conversation you have, regardless of thread or team.
Use cases:
- Communication style preferences ("Always respond in French," "Use bullet points for lists")
- Role context ("I am a product manager at a SaaS company with 200 employees")
- Formatting rules ("Use Markdown headers, include code examples when relevant")
- Domain knowledge ("Our primary programming language is TypeScript, our database is PostgreSQL")
How to configure:
- Navigate to the General tab in settings.
- Locate the Personal Context section.
- Enter your text in the editor.
- Toggle the Include in all threads switch to enable automatic injection.
- Save your changes.
When enabled, personal context appears in the context assembly alongside thread-specific and team auto-context blocks. It is sent with every request to the AI model.
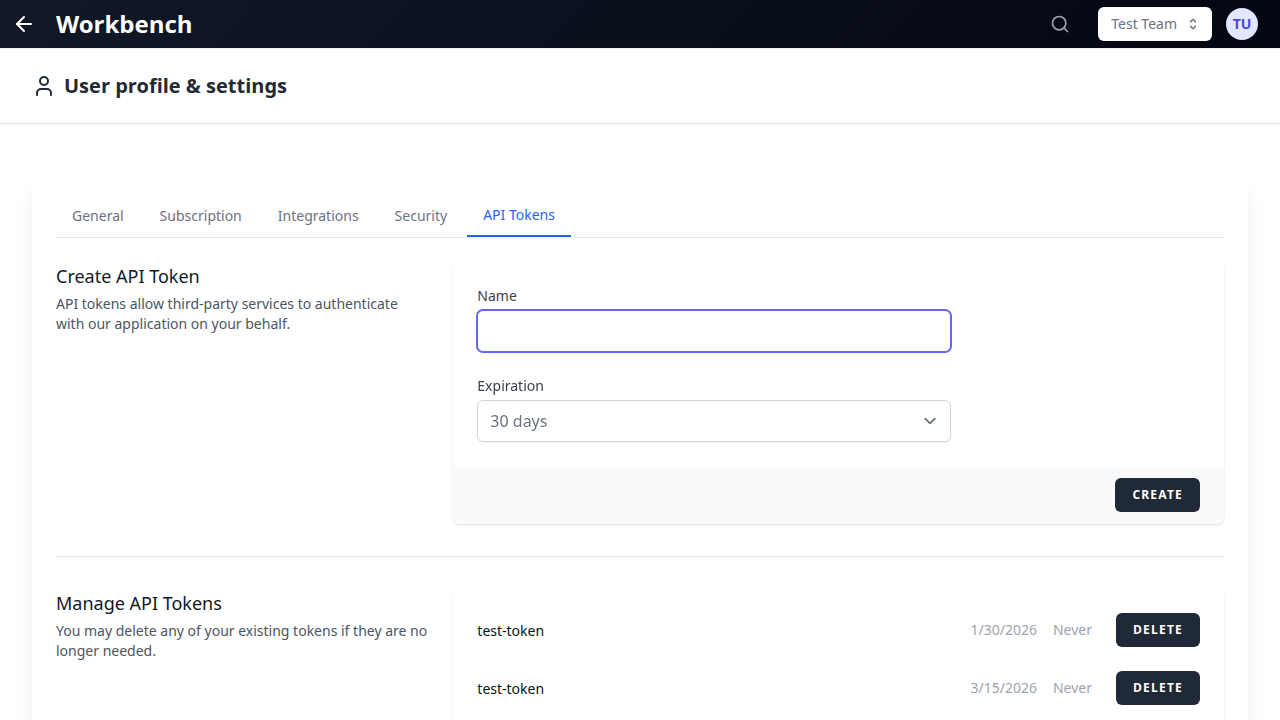
API Tokens
API tokens allow external applications and scripts to interact with GPT Workbench on your behalf. Use them for automation, CI/CD integrations, scheduled tasks, and programmatic access to the API.
Creating a Token
- Navigate to the API Tokens tab.
- Click Create Token.
- Enter a descriptive name for the token (for example, "CI Pipeline," "Zapier Integration," or "Daily Report Script").
- Select the scopes (permissions) the token should have. Available scopes control which API endpoints the token can access.
- Click Create.
- The token value is displayed once. Copy it immediately and store it securely. You cannot retrieve the token value after closing this dialog.
Viewing Active Tokens
The token list displays all your active tokens with the following information:
- Name -- The descriptive label you assigned.
- Created -- When the token was created.
- Last Used -- The most recent time the token was used to authenticate an API request. Shows "Never" if the token has not been used.
- Scopes -- The permissions granted to the token.
Revoking Tokens
To revoke a token and immediately invalidate it:
- Locate the token in the list.
- Click the Revoke button (or the delete icon).
- Confirm the revocation.
Revoked tokens are permanently deleted. Any application or script using the revoked token will receive authentication errors on subsequent requests. Create a new token if access is still needed.
Token Security Best Practices
- Create separate tokens for each integration or script. This limits the impact if a single token is compromised.
- Use the minimum required scopes for each token.
- Revoke tokens immediately when they are no longer needed.
- Never commit tokens to version control or share them in plaintext.
- Rotate tokens periodically as part of your security hygiene.
Integrations
The Integrations tab manages your connected OAuth accounts for third-party services. These connections enable context blocks and tools that interact with external business systems.
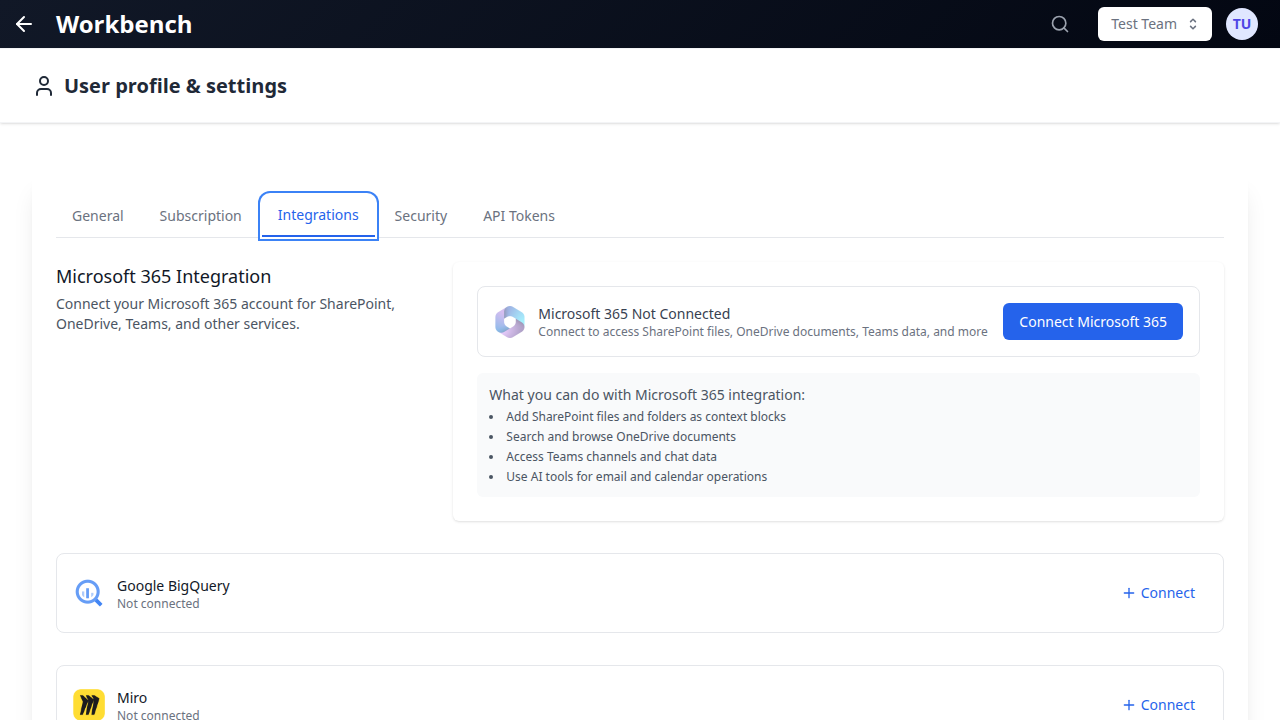
Available Integrations
| Service | Capabilities |
|---|---|
| HubSpot | CRM context blocks (contacts, companies, deals), HubSpot tools |
| Microsoft 365 | SharePoint and OneDrive context blocks, Outlook email tools, Calendar tools, Teams tools |
| Google Workspace | Google Drive context blocks, Gmail tools, Calendar tools, Docs access |
| SugarCRM | CRM module records as context blocks |
| Document360 | Knowledge base articles as context blocks |
| Teamwork | Project management tools for task and ticket tracking |
| Google (OAuth) | Google account authentication for Workspace features |
| Social media tools and content management |
Connecting an Integration
- Navigate to the Integrations tab.
- Locate the service you want to connect.
- Click Connect.
- A popup window opens with the service's OAuth authorization page.
- Log in to the service (if not already authenticated) and grant the requested permissions.
- The popup closes automatically and the integration status updates to show the connected account name.
Multiple Accounts
Some integrations support connecting multiple accounts from the same provider. For example, you might connect two HubSpot portals (production and sandbox) or multiple Google Workspace accounts. Each connected account is listed separately with its account name or identifier.
Disconnecting an Integration
- Locate the connected account in the integration list.
- Click Disconnect (or the disconnect icon).
- Confirm the action.
Disconnecting removes the stored OAuth tokens and revokes GPT Workbench's access to the service. Context blocks and tools that depend on the disconnected integration will show an error state until the integration is reconnected.
Expired Tokens
OAuth tokens have limited lifespans. When a token expires, the integration displays a red error indicator. To resolve:
- Click the error indicator or the Reconnect button.
- Complete the OAuth flow again in the popup window.
- The integration resumes normal operation with a fresh token.
GPT Workbench automatically refreshes tokens before they expire whenever possible. Manual reconnection is only needed when the refresh token itself has expired or the service has revoked access.
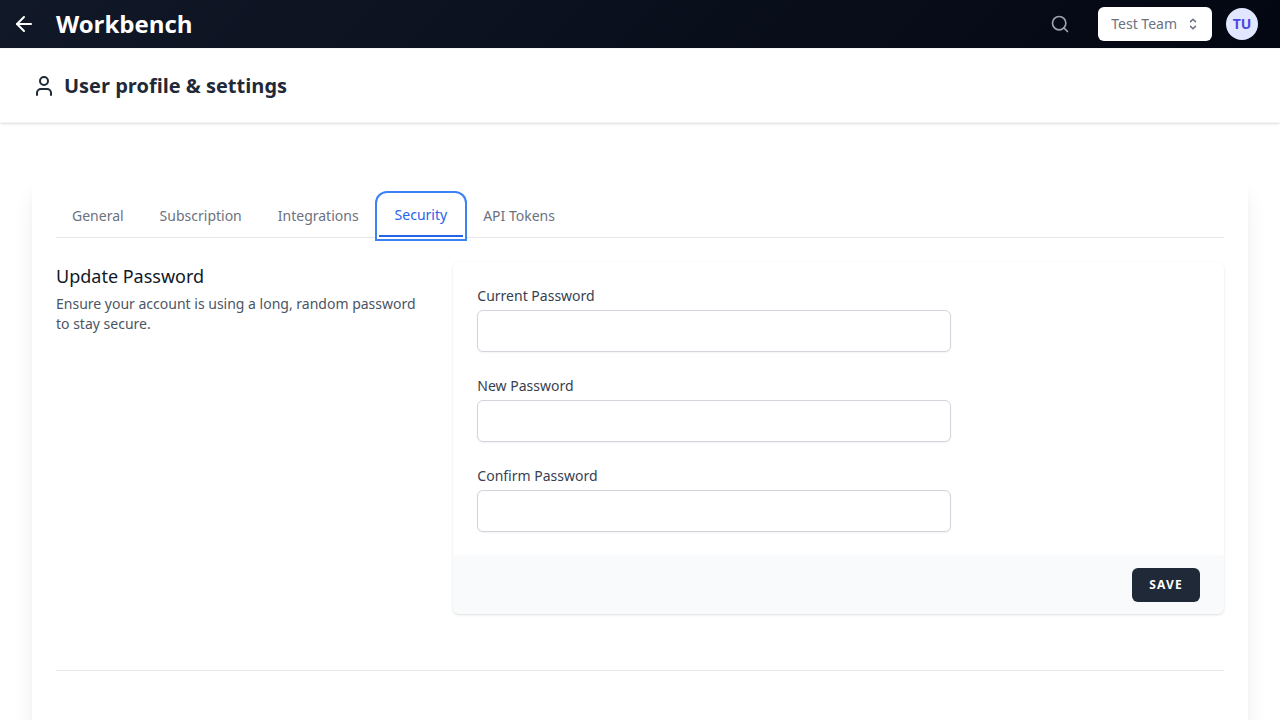
Security
The Security tab provides controls for protecting your account.
Change Password
Update your account password:
- Enter your current password.
- Enter the new password (minimum length and complexity requirements are displayed).
- Confirm the new password.
- Click Update Password.
Password changes take effect immediately. Active sessions remain valid -- you are not logged out of other devices automatically (see "Active Sessions" below to manage this).
Two-Factor Authentication
Two-factor authentication (2FA) adds a second layer of security to your account. When enabled, logging in requires both your password and a time-based one-time code from an authenticator app.
Setting up 2FA:
- Navigate to the Security tab.
- Click Enable Two-Factor Authentication.
- A QR code is displayed. Scan it with your authenticator app (Google Authenticator, Authy, 1Password, or any TOTP-compatible app).
- Enter the six-digit code from your authenticator app to verify the setup.
- A set of recovery codes is generated. Download or copy these codes and store them securely. Each recovery code can be used once to log in if you lose access to your authenticator app.
- Click Confirm to activate 2FA.
Using 2FA:
After entering your password on the login page, a second screen prompts for your six-digit code. Enter the current code from your authenticator app. Codes rotate every 30 seconds.
Recovery codes:
If you lose access to your authenticator app, use a recovery code to log in. Each code is single-use. After logging in with a recovery code, reconfigure your authenticator app immediately and generate new recovery codes.
Disabling 2FA:
- Navigate to the Security tab.
- Click Disable Two-Factor Authentication.
- Enter your current password to confirm.
- 2FA is removed from your account.
Active Sessions
View all devices and browsers currently logged into your account:
- Current session -- Identified with a "This device" label.
- Other sessions -- Listed with device type, browser, approximate location, and last activity timestamp.
Logout Other Devices
To end all sessions except your current one:
- Click Logout Other Devices in the Security tab.
- Enter your password to confirm.
- All other sessions are terminated immediately.
This is useful if you suspect unauthorized access or if you have logged in on a shared or public device.
Subscription
The Subscription tab displays your current plan, usage limits, and billing information.
Current Plan
View the subscription plan assigned to your account or organization:
- Plan name -- The active subscription tier.
- Feature access -- Which features are included (model selection, tools, integrations, automation).
- Usage limits -- Maximum threads, context blocks, tool invocations, and other quota-based limits.
- Renewal date -- When the current billing period ends.
Usage Summary
A summary of your current-period usage against plan limits:
- Threads created
- Messages sent
- Tokens consumed (input and output)
- Tool invocations
- Context blocks attached
- Cost incurred
Usage resets at the start of each billing period.
Billing
Manage payment methods, view invoices, and update billing details. Invoice history displays all past charges with date, amount, and status.
Summary of Settings
| Tab | What You Configure |
|---|---|
| General | Name, email, language, dark mode, preferred model, personal context |
| API Tokens | Create, view, and revoke tokens for programmatic API access |
| Integrations | Connect and manage OAuth accounts (HubSpot, MS365, Google, etc.) |
| Security | Password, two-factor authentication, active sessions, remote logout |
| Subscription | Plan details, usage limits, billing information |
Related Documentation
- Getting Started -- Platform overview and core concepts
- Teams -- Team management and collaboration settings
- Admin Panel -- Organization-wide settings (for administrators)
- Models & Abilities -- Model selection and provider-native features
- Context Blocks -- Creating and managing context blocks
- HubSpot Integration -- Detailed HubSpot OAuth setup
- Microsoft 365 Integration -- SharePoint, OneDrive, and Office 365 setup
- Google Workspace -- Google Drive, Gmail, and Calendar setup